Share


Kubeflow is an open-source machine learning (ML) project designed to enable quick and easy deployments of ML processes on Kubernetes (k8). On March 2, Kubeflow made an exciting announcement of its first major release with the version 1.0. Even though Kubeflow is deployed on the Kubernetes environment, Kubernetes knowledge is welcomed, but not required.
Kubeflow pipelines are one of the products available within the Kubeflow platform. The product allows Data Scientists to set up reusable and modular ML pipelines into the Kubernetes environment. In this post, I will guide you through setting up Kubeflow in
Google Cloud Platform (GCP). Kubeflow is cloud-agnostic and can be hosted in any environment where Kubernetes can be run (on-premise, GCP, AWS, Azure, etc.). Once Kubeflow is up and running, we will deploy and run our first pipeline.
 Example of a sample pipeline in Kubeflow Pipelines (
[Sample] ML - XGBoost - Training with Confusion Matrix)
Example of a sample pipeline in Kubeflow Pipelines (
[Sample] ML - XGBoost - Training with Confusion Matrix)
Deploying Kubeflow
Kubeflow can be deployed via a command-line or a user interface. For all the installation options and instructions, check the resources section below. In the example, we'll walk through Kubeflow setup via UI.Deploying Kubeflow via UI
- Create or use an existing Google Cloud Project
- Make sure that you are the owner of the project
- Billing should be enabled
- Fill out the required fields and start the process by clicking on Create Deployment at https://deploy.kubeflow.cloud/#/deploy
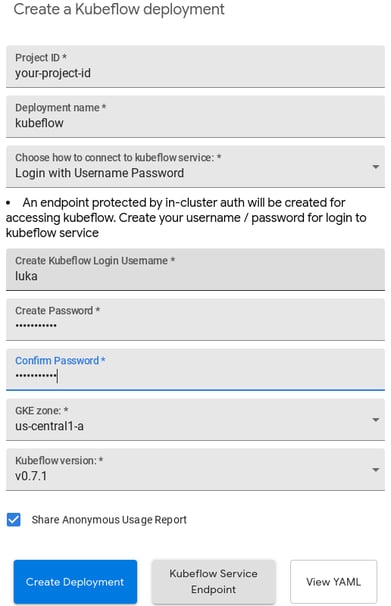
- Use the Project ID from step one
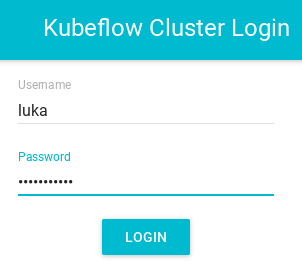
- For this example we selected "Login with Username and Password", you can also utilize GCPs cloud identity aware proxy
- This will automatically enable all the APIs required for Kubeflow to run
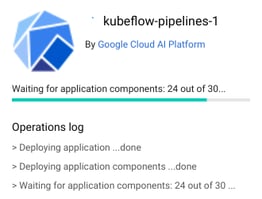
- The setup process takes about 10-15 minutes

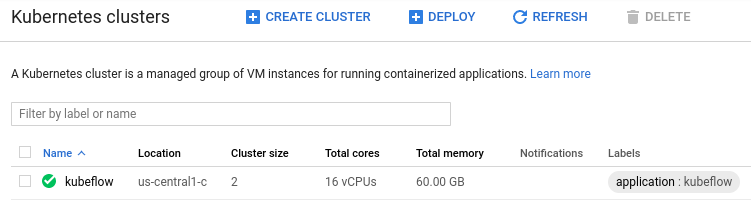
- During the deployment, you will notice a new k8 cluster in the selected project
- At the end of the process, your Kubeflow environment will be available at https://kubeflow.endpoints.project-id.cloud.goog/ where you can log in with the username and password provided in step one
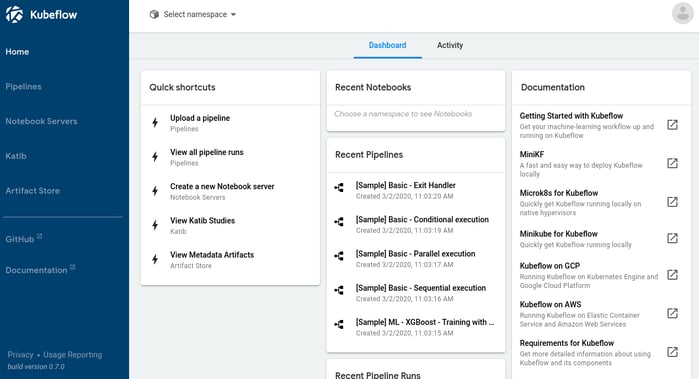
- Once logged in you should be able to see the following dashboard
Components and Pipeline
Kubeflow pipelines are built out of components (self-contained code with inputs and outputs packaged as a Docker Image) and a pipeline (a directed graph connecting the components).Components
Containerized components, can be created and packaged independently or using Kubeflow's Python SDK. Kubeflow pipelines also support lightweight components that do not require a docker container image and are "hardcoded" within the pipeline's configuration file. Components are defined with metadata (name and description), a list of inputs and outputs and implementation (container location and a run command). [sourcecode title="Example of a Component Definition"] name: Select Interesting Features description: Select X features that we input inputs: - {name: BQ Table} - {name: SelectX, type: Integer, default: '5', help: Number of features you'd like to select} outputs: - {name: Top x Features, type: list of strings} implementation: container: image: gcr.io/adswerve-kubeflow/topXFeatures@sha256:b3a64d57 command: [ /ml/select.py, --bq-table, {inputValue: BQ Table}, --select-x, {inputValue: SelectX}, --out-features, {outputPath: Top x Features}, ] [/sourcecode]Pipeline
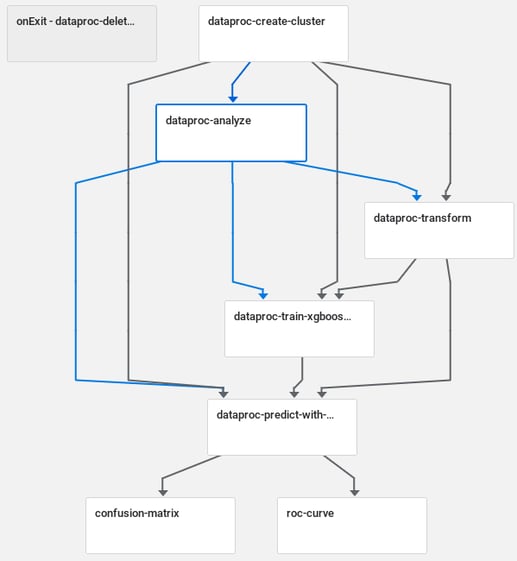
Pipeline is a set of rules connecting components into a directed acyclic graph (DAG). Example of a sample pipeline in Kubeflow Pipelines (
[Sample] ML - XGBoost - Training with Confusion Matrix)
Developing and Deploying a Pipeline
In this example, we will be developing and deploying a pipeline from a JupyterLab Notebook in GCP's AI Platform. The function will be relatively simple, calculating the greatest common divider of three input numbers. We will utilize lightweight components and go through a process of manually uploading a pipeline into the Kubeflow Pipelines UI. All these steps can be automated and components can be containerized.- We will be using the kfp SDK to create components and pipeline. Use the following command to install the SDK in Python3 environment. [sourcecode]!pip3 install kfp --upgrade[/sourcecode]
- The code below creates a lightweight component using a func_to_container_op decorator. Code is saved in the pipeline.yaml file (see step 5) and is executed on a base image (tensorflow/tensorflow:1.13.2-py3). [sourcecode language="python"]from kfp.components import func_to_container_op @func_to_container_op def gcd(a: int, b:int) -> int: """Find the Greatest common divider, using Eucledian algorithm""" while(b): a, b = b, a % b return a [/sourcecode]
- At this point, we can start adding components to our pipeline. One component can be reused multiple times. A decorator dsl.pipeline is used to create a pipeline from our method. Each component has an output attribute that contains the value of the return function. [sourcecode language="python"] @dsl.pipeline( name='GCD3 pipeline', description='Calculates a Greatest Common Divider of 3 numbers (a,b,c).' ) def gcd3_pipeline( a:int = 50, b:int = 35, c:int = 20 ): gcd_ab = gcd_op(a, b) gcd_abc = gcd_op(gcd_ab.output, c) [/sourcecode]
- Now that the pipeline has been built it can be exported into a zip file using a compiler function. [sourcecode language="python"] from kfp import compiler pipeline_name = gcd3_pipeline.__name__ + '.zip' compiler.Compiler().compile(gcd3_pipeline, pipeline_name) [/sourcecode]
- The archive includes a pipeline YAML with definitions of our components and pipeline. I suggest examining the file to better understand how Kubeflow Pipelines work, in the future this step can be automated and pipelines can be deployed and ran programmatically.

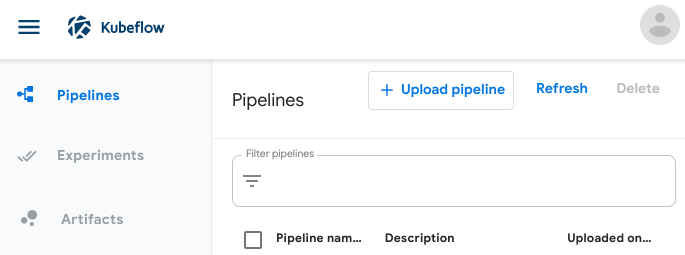
- You can now go ahead and upload the compressed version of the pipeline to your Kubeflow UI, by navigating to "Pipelines" and clicking on "Upload pipeline".
- You should now see the pipeline visualized along with the ability to run it.

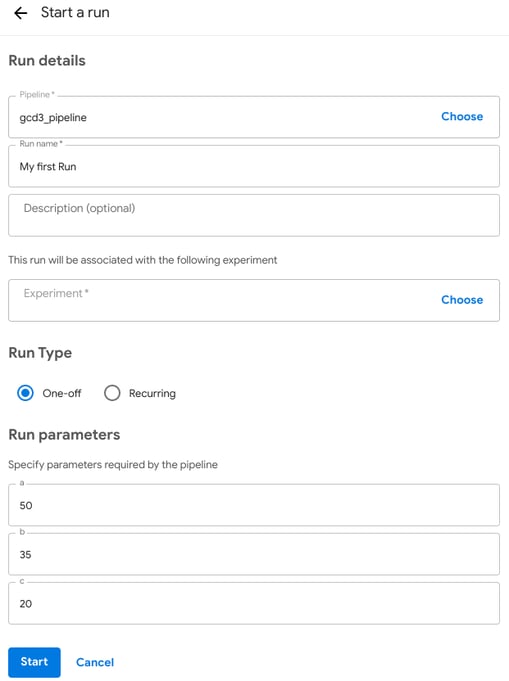
- Before running the pipeline you can update the:
- Run name, which should be unique making it easy to review the results. Adding a timestamp to it, especially when running it programmatically is recommended.
- Experiment, that serves as a grouping of multiple runs. If not specified the "Default" experiment is used.
- Run Type, which can be a single run or a recurring run. With recurring runs, we can set a pipeline to run on a certain time interval. We can also set up a cron definition.
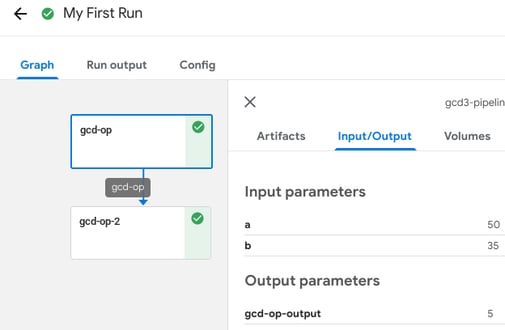
- Parameters, which are the input parameters of the pipeline in our code snippet above we defined parameters a, b and c with default values 50, 35 and 20. These values can be customized for each run.
- Generally, a run would have many side inputs such as an ML model or a table of predictions. In our case, we are returning the value of the greatest common divider function.