
Share


With the new Zones feature in Google Tag Manager, Google is adding more options to large organizations and, by doing so, has become the primary player in enterprise-level tag management. How, do you ask? Let's find out!
 Once here, you can either click the add icon to the right of the field, which opens a list of containers you have access to in the current account, or you can just type any existing container ID to the
Container ID
field. Then, give the container a descriptive nickname that will help identify the purpose of the container.
Once here, you can either click the add icon to the right of the field, which opens a list of containers you have access to in the current account, or you can just type any existing container ID to the
Container ID
field. Then, give the container a descriptive nickname that will help identify the purpose of the container.
 Click ADD to save our changes.
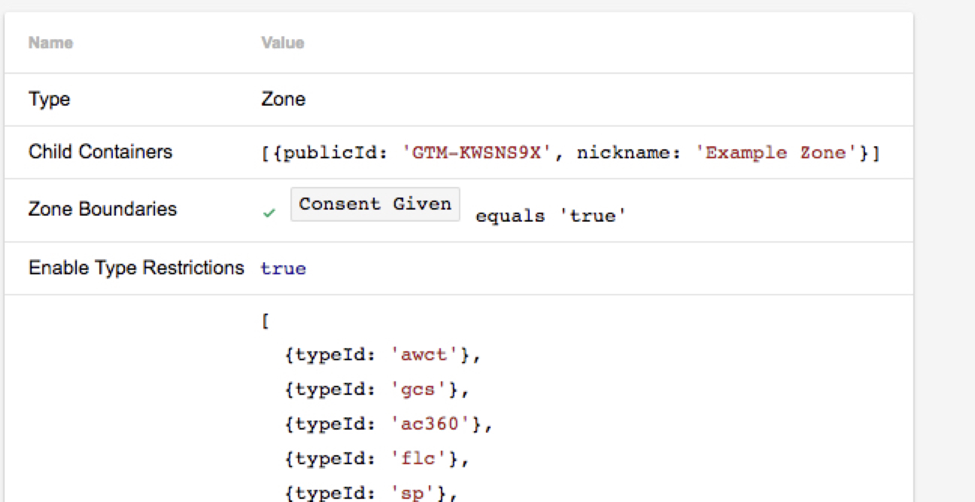
 Boundaries are page rules. Page rules are conditions that a page needs to meet for the rule to pass. In order for these rules to work, they need to be available when gtm loads, otherwise they will not work.
 With
Type Restrictions
, you can restrict the Zone to only allow certain types of tags, triggers, and variables to function in the Zone. To enable this, switch the toggle to on. This means that custom HTML and custom Javascript will not work in this zone—they'll need to be enabled if we want to use them.
Lastly, if you disable trigger and variable types, it's important to remember that containers can have very intricate chains of trigger and variable evaluation. By disabling a single type, you can potentially break the functionality in a linked container. So, be mindful!
To add or restrict, simply click on the type and an overlay will popup. There you can enable or disable the tag, trigger, or variable type.
With
Type Restrictions
, you can restrict the Zone to only allow certain types of tags, triggers, and variables to function in the Zone. To enable this, switch the toggle to on. This means that custom HTML and custom Javascript will not work in this zone—they'll need to be enabled if we want to use them.
Lastly, if you disable trigger and variable types, it's important to remember that containers can have very intricate chains of trigger and variable evaluation. By disabling a single type, you can potentially break the functionality in a linked container. So, be mindful!
To add or restrict, simply click on the type and an overlay will popup. There you can enable or disable the tag, trigger, or variable type.
What are Zones?
It's a new feature in GTM!- Google rolled this out at the end of March
- It's available to 360 CLIENTS ONLY
- Supports linking multiple containers on a single site
- Allows access restriction for our clients
- Setup boundaries for where containers can load
What does this mean?
It means that GTM now supports loading multiple containers on the same page. It’s helpful if you have multiple companies or organizations working on the same site but you, for one reason or another, want to restrict access to your main container. GTM Zones have a feature called, boundaries , which are basically rules you can use to restrict Zones to certain pages or groups of pages. Additionally, Zones let you define restrictions for tags, triggers, and variables, all of which give you even more control over what these linked containers can run on your site.Why use Zones?
Perhaps the most common example of when Zones can be used is when one team manages the on-site tracking in Google Analytics while a separate team is in charge of media tracking through advertiser pixels. Google Tag Manager is a great tool for managing the implementation of both of these tools but having two teams share a Container can cause issues. If both teams can publish changes, then one team can inadvertently impact the other’s data collection—the ownership of Triggers and Variables isn’t clear. If only one team can publish changes, then they become a roadblock for the other team’s data collection. If one or both of these teams are third-party vendors, then issues of responsibility and communication become even more pronounced. Enough talking, let's get going!Create a Zone
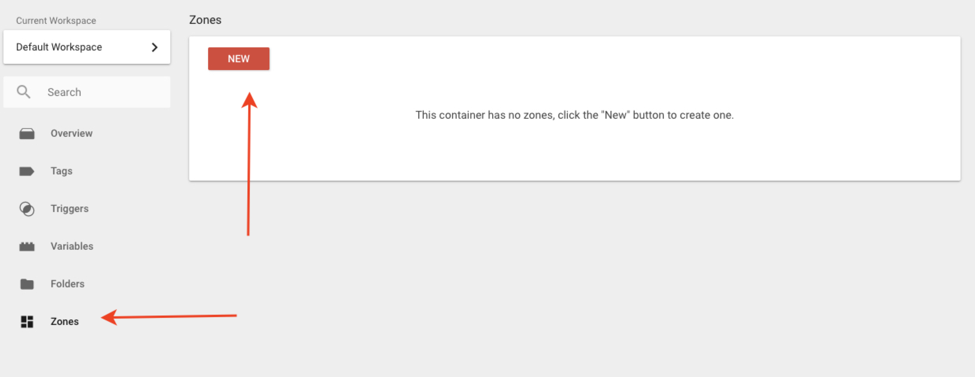
To create a new Zone, click the Zones entry in the navigation. Then click new.
Name it and Link a Container
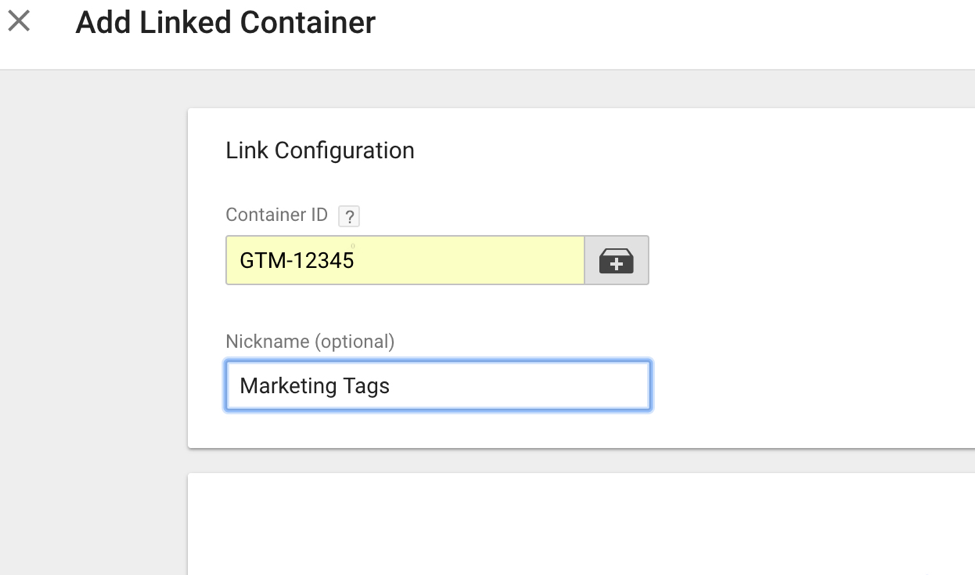
After we've created it we will be looking at the Zone Settings page. Here we can link a new container to the Zone by clicking the Zone Configuration field to enter the edit mode. Then, click the blue plus button to open the container link overlay.
Once here, you can either click the add icon to the right of the field, which opens a list of containers you have access to in the current account, or you can just type any existing container ID to the
Container ID
field. Then, give the container a descriptive nickname that will help identify the purpose of the container.
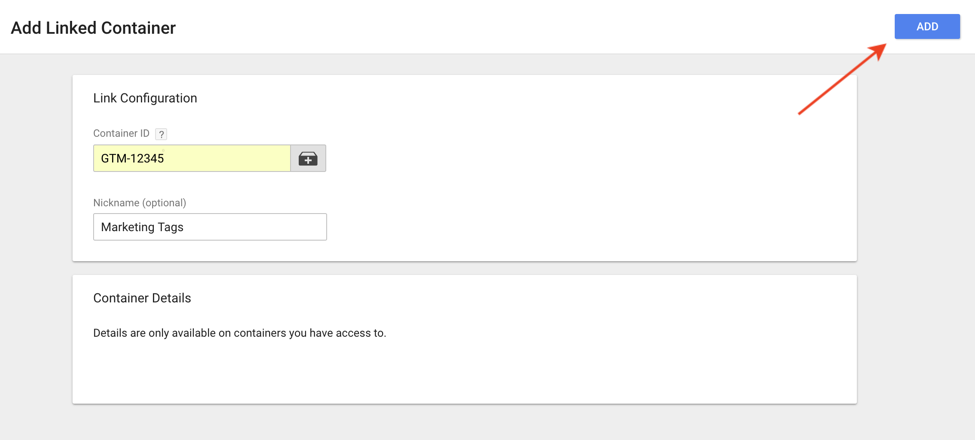
Click ADD to save our changes.
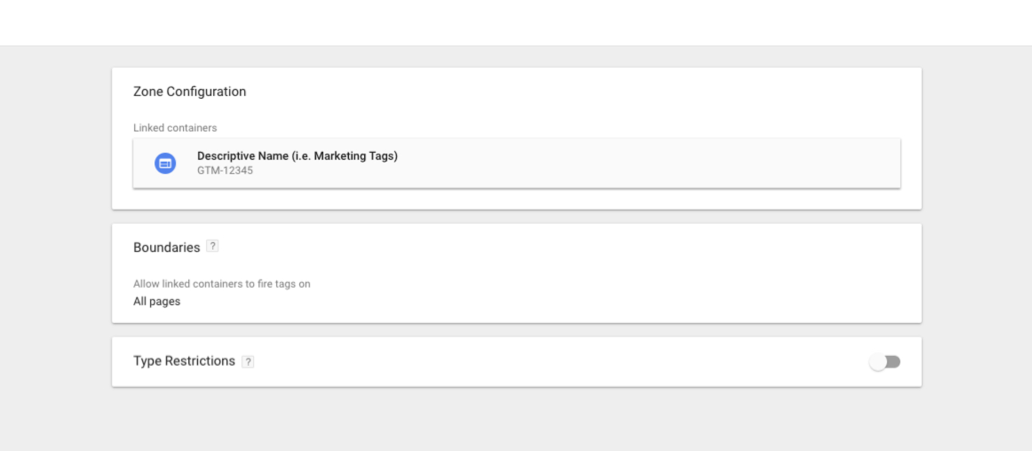
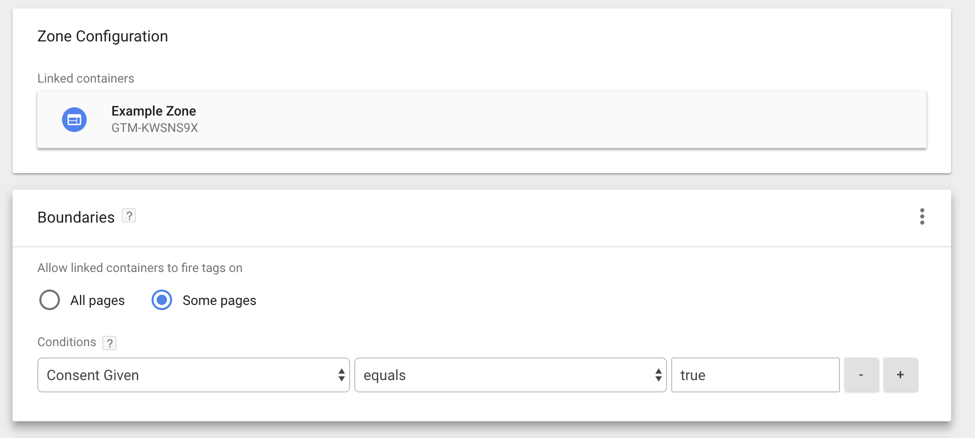
We have our Zone!
After we click add, this should close the overlay and present us with the container we've linked.
Add some Boundaries
Boundaries are page rules. Page rules are conditions that a page needs to meet for the rule to pass. In order for these rules to work, they need to be available when gtm loads, otherwise they will not work.
Type Restrictions
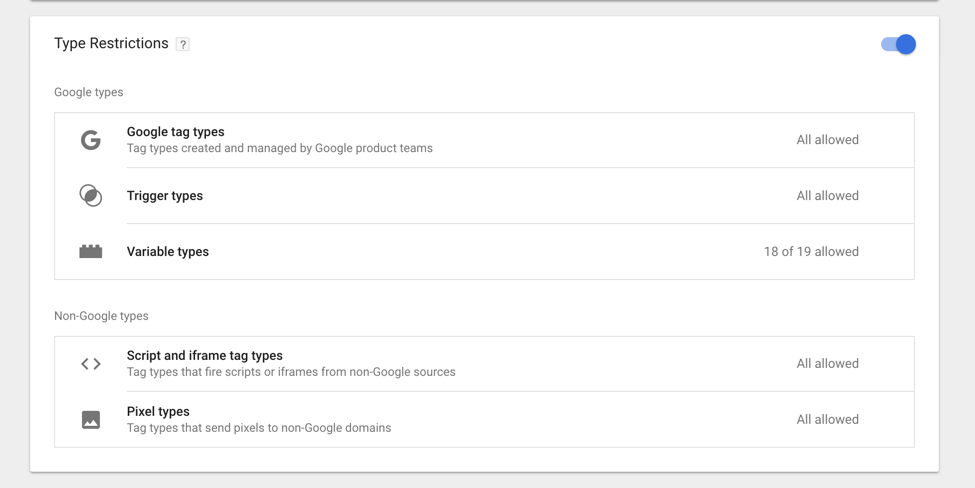
By default, only the template tags, triggers, and variables that exist in the container will function as they do in the original container.
With
Type Restrictions
, you can restrict the Zone to only allow certain types of tags, triggers, and variables to function in the Zone. To enable this, switch the toggle to on. This means that custom HTML and custom Javascript will not work in this zone—they'll need to be enabled if we want to use them.
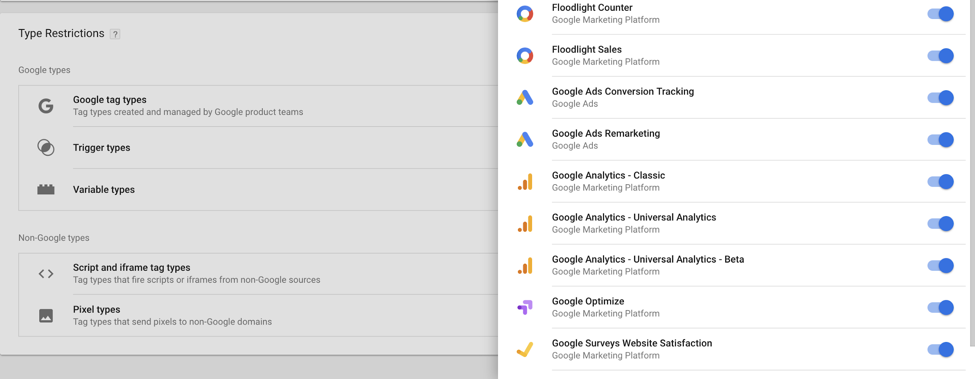
Lastly, if you disable trigger and variable types, it's important to remember that containers can have very intricate chains of trigger and variable evaluation. By disabling a single type, you can potentially break the functionality in a linked container. So, be mindful!
To add or restrict, simply click on the type and an overlay will popup. There you can enable or disable the tag, trigger, or variable type.
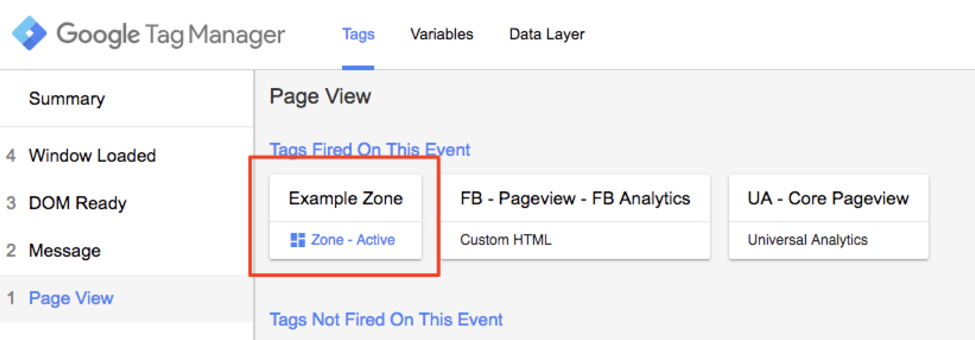
Preview Zones
Once we have our zone created we can preview it live on the site. Here we can see if the zone is Active/Inactive and the types that have been enabled inside of it.