
In my recent blog we covered a brief overview of the history of “Enhanced” features within the Google Marketing Platform, including the rollout of Enhanced Conversions (EC) for Web, Leads in Google Ads, and the first signs of EC in CM360 and SA360. Today, we’ll dive a bit deeper into the EC implementation process and kick things off with some reasons why an advertiser would want to enable EC in the first place. Additionally, we’ll look at what’s actually happening with the data, and go into the implementation & QA process in GTM before finishing off with a few privacy considerations Let’s dive in!.
THE WHY AND HOW OF ENHANCED CONVERSIONS
So, what benefit does EC actually bring to the GMP? If you’re familiar with Floodlight Conversion Modeling or modeled conversions in Google Analytics, the end result is the same: more attributed conversions. Conversion modeling uses Google’s machine learning model to estimate online conversions that couldn’t be observed directly due to user privacy settings, technical limitations, or other factors. While it’s nice to see additional conversions, it’s also a black box, as there is no way to see how many conversions were modeled within reports.
EC, on the other hand, is much more transparent within Google Ads, though that same transparency has yet to be added to any of the 360 products. Within Google Ads, you’re able to see the direct result of your EC configuration as a percent increase of total conversions, sorted by serving network (search, display, etc.). EC utilizes your hashed first-party data to recover unmeasured conversions by matching it with signed-in Google Account information and activity. Unlike modeled conversions, EC is not an estimate. They are actual conversions that occurred but weren’t measured for the same reasons described for conversion modeling. As a result, EC improves conversion measurement accuracy, boosts marketing campaigns’ performance, and provides marketers with more data for bid strategy optimization.
When a user completes a conversion on your website, such as making a purchase, there may be first-party data available about that customer that can be collected in a conversion tag and sent to Google. Depending upon the EC implementation method, either the advertiser normalizes and hashes the first-party data before sending it to Google, or Google will normalize and hash the data using the SHA256 hashing algorithm before it reaches their servers. The user-provided data, typically an email address, phone number, or mailing address, is then used by Google to match your customers to their Google accounts if they were signed in before interacting with one of your ads.
IMPLEMENTING ENHANCED CONVERSIONS IN GTM
Enhanced conversion data can be sent to Google via Google Tag Manager (GTM), the Google Tag, or the Google Ads API. The method we’ll explore in depth is the manual configuration in GTM, the most common way of collecting user-provided data for Enhanced Conversions.
In GTM, open the Floodlight tag for which you are enabling Enhanced Conversions. There is a checkbox reading “Include user-provided data from your website” in the tag setup. Check the box and a dropdown will appear asking you to choose a variable:

Select your user-provided data variable from the dropdown. If you don’t have one, create a new one:
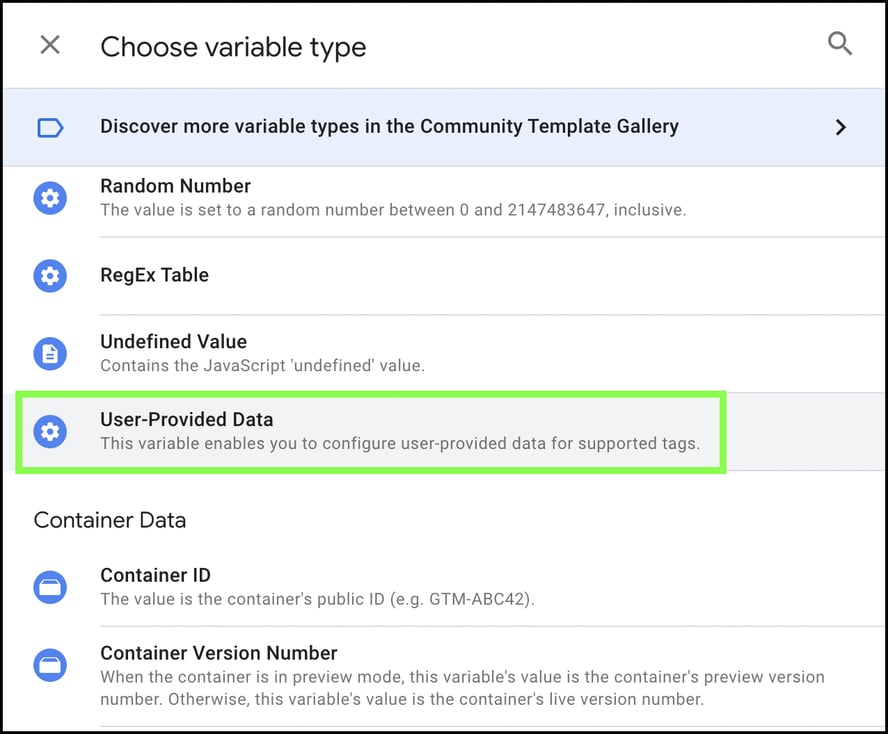
After selecting the User-Provided Data variable type, you’ll be faced with three options:
- Automatic configuration is only available for certain accounts and conversion actions. If you do not see it presented as an option, it could be that there isn’t any customer data available on the conversion page, customer data is stored in inconsistent ways across multiple pages, or simply that there’s not enough conversion data available.
- Code configuration is a custom script that sends hashed customer data. This takes the most time to configure but is the safest and most robust method since you know it will always be sending properly formatted and hashed values.
- Manual configuration is the most common method of implementation through GTM and the one we’re focusing on in this blog post. This can use CSS elements but is more reliably set up using dataLayer variables.
If you’re unfamiliar with the concept of a dataLayer, it’s JavaScript code containing a number of key-value pairs. For example, a hypothetical dataLayer for a bunch of grapes may resemble {color: green; number_of_grapes: 33; has_seeds: false} and so on. If you eat a few grapes and now only have 30, you would update that grapes dataLayer by “pushing” a new value of 30 to the number_of grapes key, subsequently telling you that there are 30 grapes in the bunch. Much like this, as a user completes a checkout flow, values like that person’s first and last name, email, location, etc., may be pushed into the dataLayer.
Looking again at the manual configuration options, you’ll see a number of blank fields for various pieces of personal information. Go down and set each field to the appropriate GTM variable. Some of these may be available in the dataLayer and some may need to be created by scraping the page for an HTML ID, class, or other selector. Notice that some of the variables entered below start with “DLV” for dataLayer variable, while others start with “JS” indicating they’re JavaScript variables:
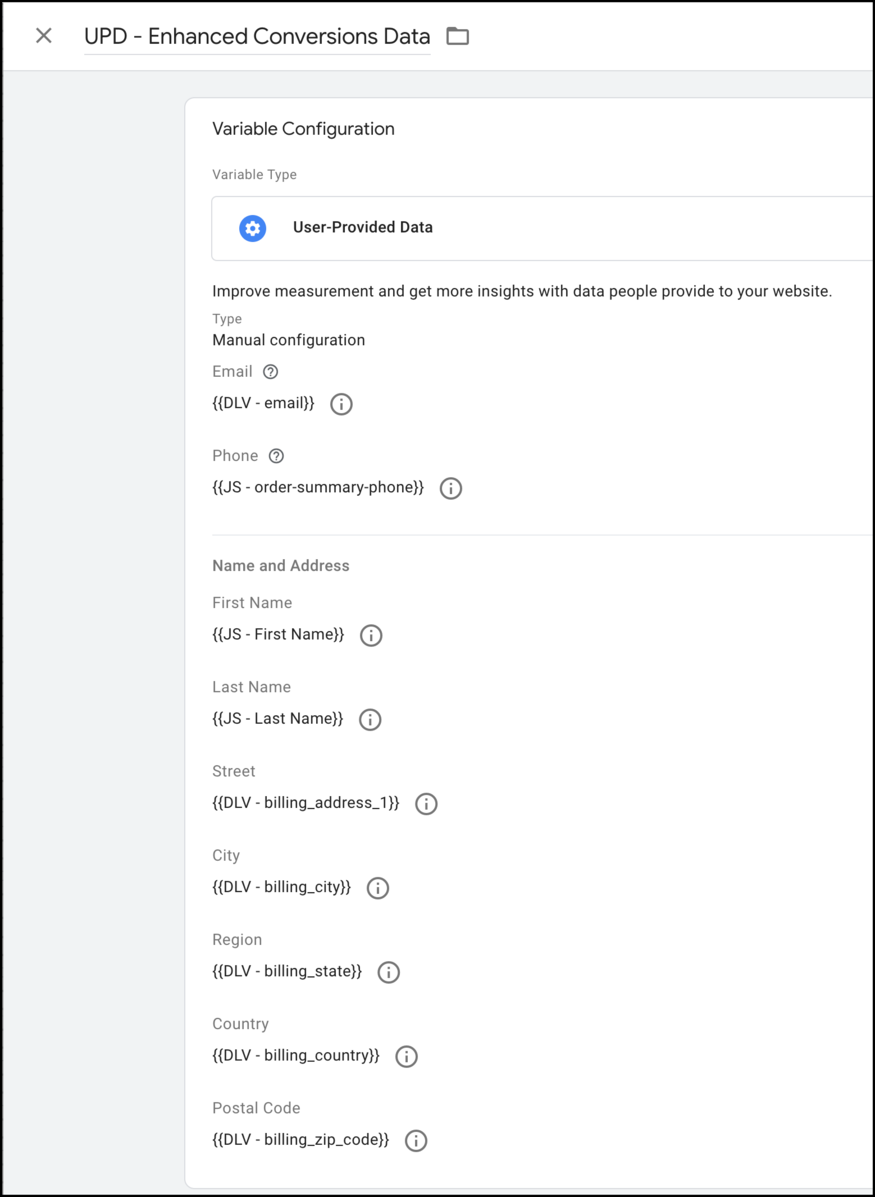
It’s not mandatory to fill out each and every field; however, you must have either email, mailing address, or phone number included. The more data you can provide, the more complete a picture you’ll get.
HOW TO QA YOUR IMPLEMENTATION
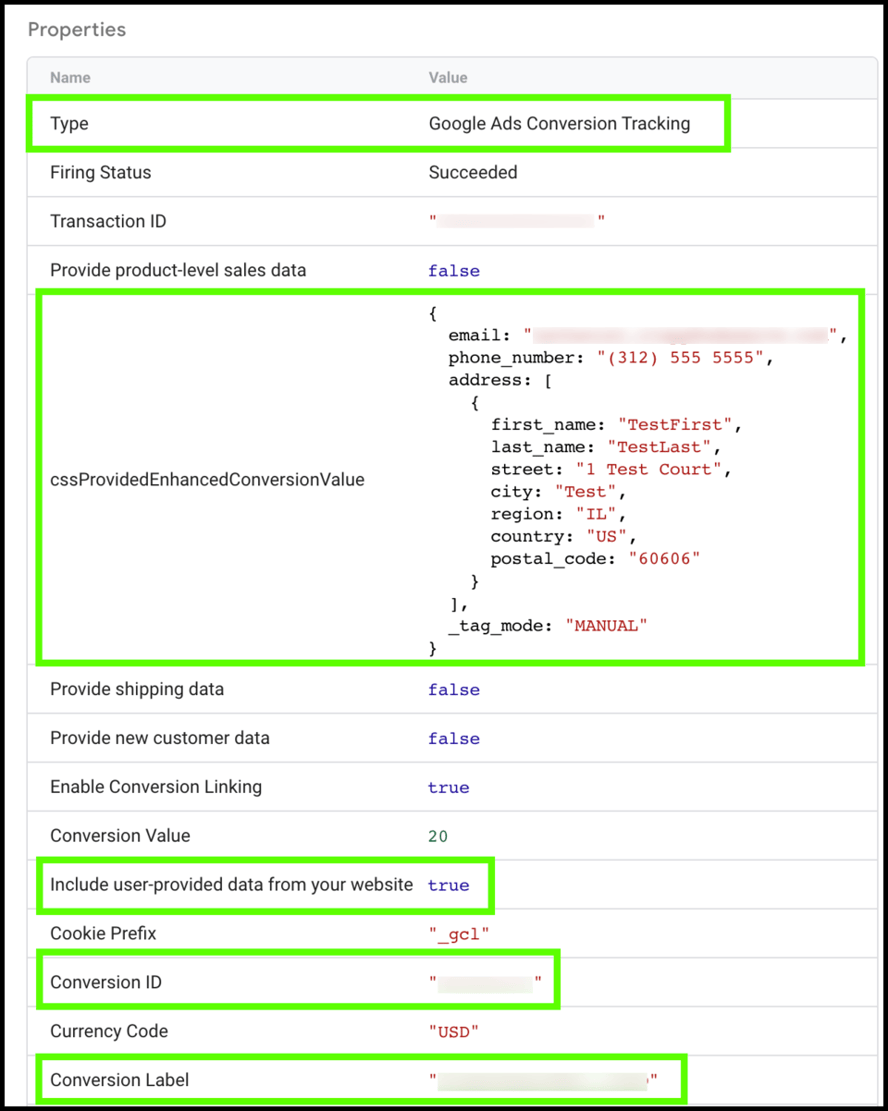
As with any changes you make to your tag implementation, it will be important to test to ensure that everything is firing as expected. You’ll want to test the tag by placing a test conversion and observing what data is passed. One way to test is within GTM Preview Mode. To do this, enter preview mode and place a test conversion. Then click on the updated tag to view the tag properties and ensure that all variables are populating correctly.
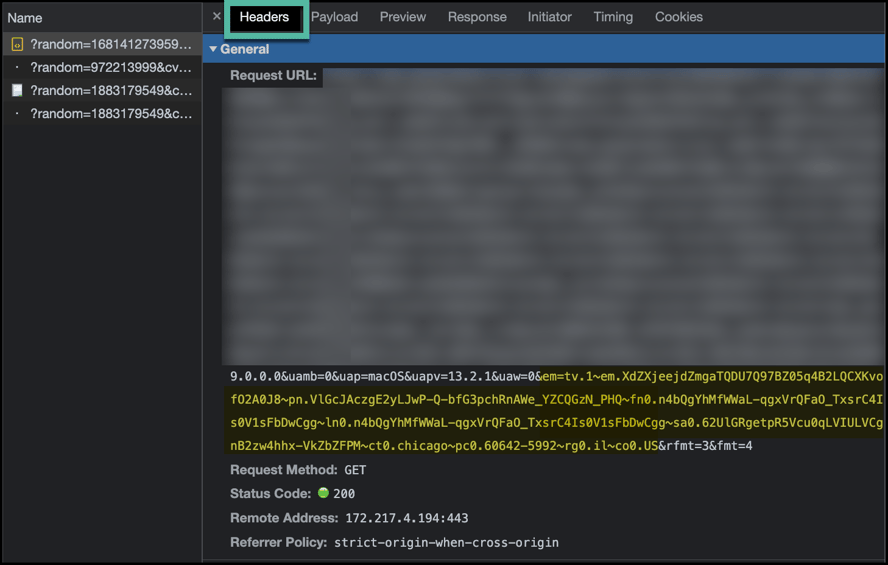
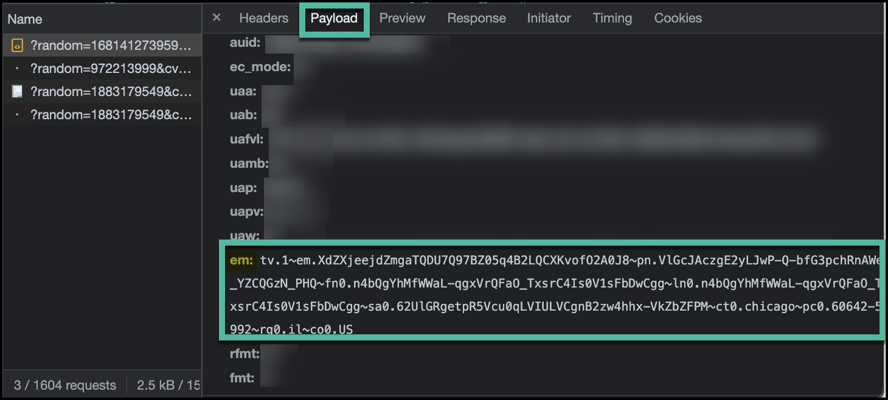
It’s also a good idea to check the network tab to observe the actual hit being sent. Locate the appropriate server call by entering the Developer Tools section of your browser, heading to the network tab, and filtering for your conversion ID, label, or other unique value. Click on the hit to reveal its details. You can look at the raw hit in the “Headers” tab, where you can see the “em” (email) parameter being passed correctly:
For an easier view, you can also click over the “Payload” tab. Here you can see each URL query parameter parsed out in a list, including the “em” parameter:
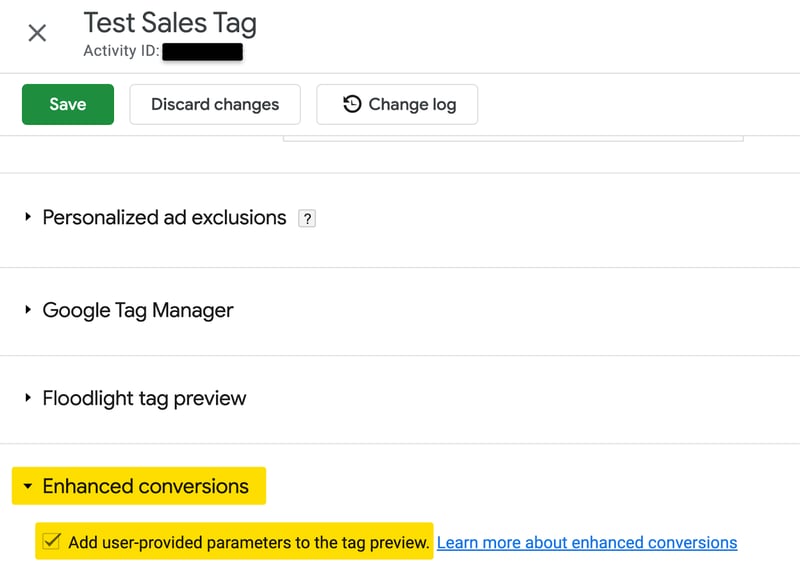
At this time, we are still waiting for Google to release more information regarding the feature’s functionality in CM360 and SA360. That said, there is currently one detailed support article within the SA360 New UI help center that focuses primarily on the GTM setup. For now, we recommend accepting the terms and conditions in CM360. The checkbox pictured below isn’t required if you’re utilizing GTM, but it will help you track which Floodlight activities are collecting EC data.
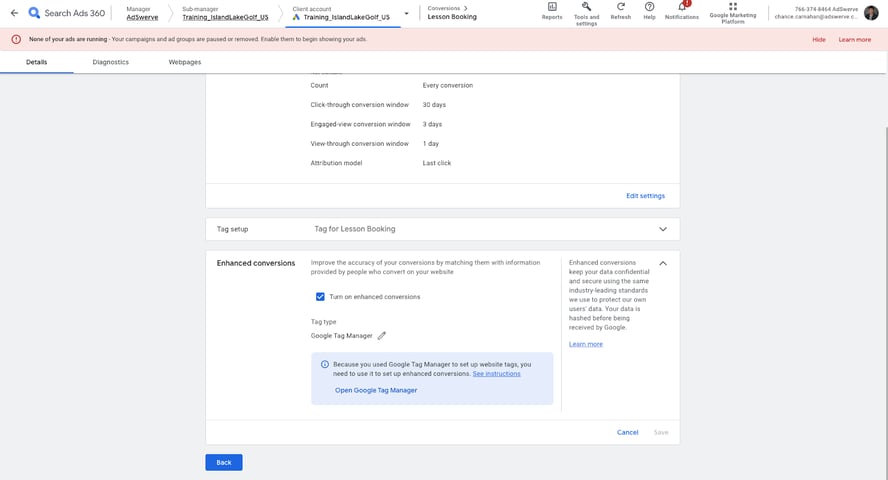
Previously, there was an option to agree to EC terms and conditions in the Legacy SA360 UI. However, advertiser (sub-manager) settings are now managed in the New SA360 UI and that option has yet to appear. There’s also a setting to enable Enhanced Conversions within the New SA360 UI at the Google Ads Account level. You can find it in the Conversions section under the Settings tab. This setting is directly linked to the Enhanced Conversions for Leads setting in Google Ads so that it can be managed in either platform. To utilize Enhanced Conversions in Google Ads, you need to enable the feature within the settings of each relevant conversion action.
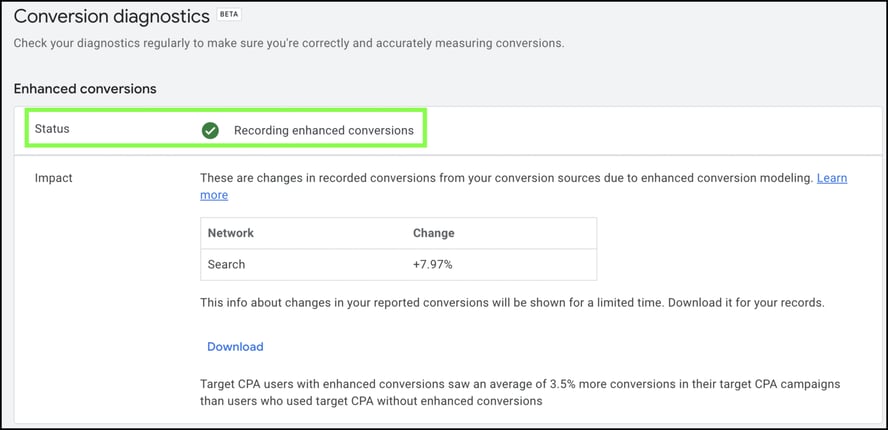
You can click over to the ‘Diagnostics’ tab of the same screen to validate that enhanced conversions are firing and populating correctly for Google Ads specifically (it may take a few days after activating enhanced conversions to see the success message here):
ADDITIONAL PRIVACY CONSIDERATIONS
What if your website is using a consent management platform (CMP)? If your website utilizes a CMP and a user opts out of all cookies or advertising cookies only, no advertising tags will fire during their visit, including the conversion tag, even if that user completes a conversion. Their data will not be collected, hashed, or stored in Google’s servers. Google Consent Mode works much the same way, where if a user opts out, their data will not be sent to Google.
As we mentioned before, when using the above-described GTM method for your EC workflow, user data is sent unhashed to Google. They then normalize and hash it before it is sent to their servers. Before it’s hashed, however, the user data is unhashed and displayed in the dataLayer. In this scenario, there’s always a chance that data could be scraped by a nefarious third party or somehow accessed from the tag before it’s hashed. When using the Google Ads API to upload data to Google, the advertiser is responsible for hashing the data first. Though it is more complex, direct uploads of this user-provided data through APIs into the respective platforms or using appended server-side sends for enhanced conversions are superior for ensuring privacy.
At Adswerve, we offer a range of services to help you boost your digital marketing efforts. If you have more questions about enhanced conversions and the potential power of Search, please reach out to learn more!